What is polymer clay?
Polymer clay is a plastic based clay that is easy to mould and comes in a wide variety of colours and effects. It cures at low temperatures in a home oven to a hard finish. There are many brands to choose from. It can be found in most craft shops and online.
Tools and equipment
For these polymer clay tutorials, I aim to use simple tools and equipment that you can find around the house. Old kitchen implements can make great tools, so have a look at the back of your drawers or raid the charity shop. Once you have used a tool for polymer clay play it should not be used again with food, so don't go using your favourite cooking knives.
A nice, smooth work surface is a must. I use a ceramic tile, which also has the bonus that you can bake on it. A great makeshift work surface is a laminated piece of card, or a sheet of plastic from the back of a notepad. I have often used an old kitchen plate, or even a manilla folder can make a good work surface.
An acrylic rolling pin is useful as it can help with conditioning clay and getting flat sheets, but not essential. A retractable craft knife is great, my knife is my trusty old friend and I won't replace it no matter how old and battered it is, but a simple butter knife will do the job. Cocktail sticks or toothpicks are an absolute must for any polymer clay toolkit, as well as kebab skewers and just about anything you find in a manicure kit. I also use a selection of cookie cutters, and even have a marble in my toolkit (only time will tell if I ever create a tutorial that calls for a marble).
You can cure polymer clay in a regular oven, but the temperature is very important - if you burn it not only will your work be ruined but it can give off pretty nasty fumes too. If you aren't totally confident in your oven's thermostat then it is well worth investing in an oven thermometer and keeping a close eye on it. You don't want all your hard work to go to waste (I speak very much from experience). I like to cover my work when I cure it which helps to prevent cracking and scorching. I just use a foil pie tray, which are cheap to buy and can be bent into different shapes depending on what you want to cover.
Working with polymer clay
Before sculpting you need to condition your clay to make it soft and pliable. This can be done by rolling clay into a flat sheet, folding it over and rolling it again, repeating until it is smooth, soft and doesn't crack when you fold it. Be careful not to trap air bubbles as these can cause cracks when curing - always roll starting from the folded side. If you don't have an acrylic rolling pin then you can condition the clay by squishing, rolling and folding it with your hands, again being careful not to trap air bubbles in the clay.
Polymer clay can be blended to make any colour you want, just roll and fold, or squish it together as you would when conditioning until you have the colour or effect you're after. Keep in mind that a little of a dark colour will go a very long way so add sparingly to begin with, adding more little by little until you get the colour you want.
Always work from light colour to dark colours when conditioning and blending clay, because a small amount of dark clay on your fingers or tools can darken lighter clays.
Polymer clay is best used for small sculptures. Large pieces can be difficult to properly cure.
Handy tip: light coloured clay is a dust magnet. You can reduce the amount of dust on your creation from your hands by rolling a scrap of light coloured clay in your fingers and hands before you start work. If you do get bits of dust on your creations you can use a cotton bud dipped in surgical spirit or rubbing alcohol to gently remove it before curing.
Always follow manufacturers instructions when using and curing polymer clay. Always wash your hands after handling raw polymer clay.
Check out The Blue Bottle Tree for wonderful detailed advice on using polymer clay.
Flower button tutorial
Here's a cheeky little flower button tutorial to help you create the perfect handmade embellishment for your sewing or craft projects. You can choose any three colours of clay you like for the buttons, I'm quite a fan of white, yellow and lilac.

You will need: work surface, knife, cocktail stick, small round lid for making the indent (nail varnish, spray bottle etc.), baking tray, baking paper (optional).

Choose your three colours of clay. How much clay you want will depend on the size of the buttons you make. I used a 2.5cm diameter ball to make five 2cm diameter buttons. Condition the clay well.

Roll the button clay into a sausage and trim the ends (this will help you portion up the clay to ensure the buttons are evenly sized).

Divide the clay into equal sized pieces.

Roll each piece into a ball by rolling gently between your palms making sure they are nice and round, not oval.

Flatten each ball into a round disc. You may want to do this on a piece of baking paper if aren't curing them on your work surface, as this will make transferring them easier.

Using your small round lid (e.g. nail varnish bottle) press firmly in the centre of each disc to create a round indent.

Repeat for each button.

Roll the petal clay into a thin sausage (about 3mm diameter).

Cut six small pieces of this sausage (about 2mm wide).

Roll each piece into a teardrop shape so you have six petals for each button.

Using s cocktail stick, press each petal into place around the centre of the button. You can often pick the petal piece up by pressing the cocktail stick into it, or you may need to position it with your fingers.

Repeat for the rest of your buttons, pressing gently on each one as you finish to firm the petals into place.

Roll the flower centre clay into a thin sausage (about 3mm in diameter).

Cut a thin piece of clay for each button (about 2mm wide).

Roll each flower centre into a small ball.

Place a ball into the centre of each flower.

Press each ball gently to flatten.

Use a cocktail stick to poke holes in the centre of each button, making sure they go all the way through and are large enough to fit a threaded needle through.

Cure the buttons according to the manufacturer's instructions.

Use your lovely handmade buttons to create something extra special.
Easter nest tutorial

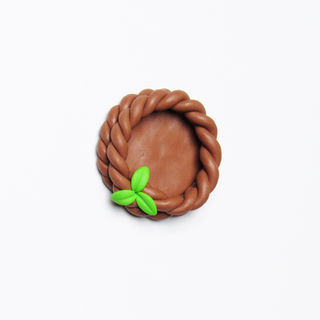
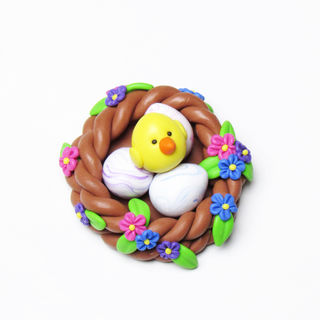
While this cute little Easter nest takes quite a while to make and has several stages, each technique is relatively straightforward if you take your time.
You should be able to find a starter pack of polymer clay which has all the colours you will need, make sure you condition each colour of clay very well before you use it, see the information about polymer clay above.
You will need a suitable work surface, a knife for cutting up the clay and helping lift pieces off the work surface (a retractable craft blade is perfect and well worth investing in, they only cost a few quid) and a cocktail stick.
Halloween pumpkin tutorial

Here's a cheeky little pumpkin video tutorial to bring you a treat this Halloween. I used a glittery orange clay for the main body, glittery green clay for the stalk and black clay for the eyes (OK, confession time, the eyes in the pic are glass micro marbles cos they just give it a more life-like feel. If you can get hold of them great, or tiny black glass seed beads. But I've used black clay in the vid below to show you how to do it, and it will look lovely too).
You should be able to find a starter pack of polymer clay which has all the colours you will need, make sure you condition each colour of clay very well before you use it, see the information about polymer clay above.
You will need a suitable work surface, a knife for cutting up the clay (a retractable craft blade is perfect and well worth investing in, they only cost a few quid, but an old butter knife will do the job too), a cocktail stick and a Biro pen lid.
Tiny Christmas Gnome Tutorial

Every house needs a little tomte gnome or two hanging around at Christmas.These little guys will make delightful stocking fillers or sectret Santa gifts too.
You should be able to find a starter pack of polymer clay which has all the colours you will need, make sure you condition each colour of clay very well before you use it, see the information about polymer clay above.
You will need a suitable work surface and a knife for cutting up the clay (a retractable craft blade is perfect and well worth investing in, they only cost a few quid, but an old butter knife will do the job too).
Tiny Snowman Tutorial

Anyone who knows me will know how much I LOVE glittery white polymer clay, it just looks like snow. And what better to make with it this Christmas than a tiny snowman ornament. Why not make some for family and friends and pop then into a homemade Christmas cracker or tiny Christmas stocking as a little treat.
Make sure you condition each colour of clay very well before you use it, see the information about polymer clay above.
You will need a suitable work surface and a knife for cutting up the clay (a retractable craft blade is perfect and well worth investing in, they only cost a few quid, but an old butter knife will do the job too) and a cocktail stick.


